📌 Printing To-Do lists from Apple Notes on a cheap ESC/POS receipt printer
I decided to buy a cheap ESC/POS receipt printer (~25 Euro).
My goal was to easily print my Apple Notes To-Do list with it.
In this post, I explain how I did it.
This post assumes that you already connected a ESC/POS receipt printer via USB to a Linux server / Raspberry Pi and that you can print (on that same machine) viaecho "Hello World!" >> /dev/usb/lp0.
Otherwise: you can follow the setup printer section to get started.
Sending text from Apple Notes to the receipt printer

To print text from Apple Notes with the receipt printer, we’ll use Apple Shortcuts.
Basic Apple Shortcuts example
In its most basic form, the shortcut looks like this:
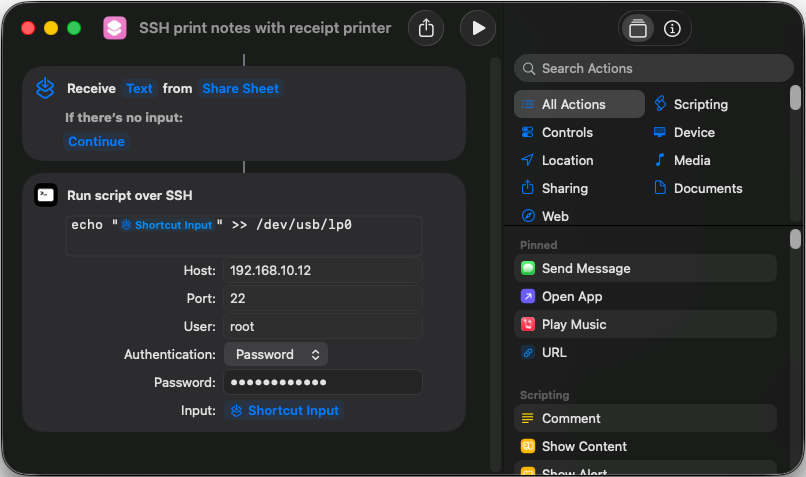
- A “Share Sheet” shortcut in Apple Shortcuts.
- The received Text is placed as “Shortcut Input” in
echo "Shortcut Input" >> /dev/usb/lp0 - The command is executed through SSH on the Linux system that has the ESC/POS printer connected via USB
Share and print from Apple Notes
After setting up the shortcut, simply click on the share button, make sure to select ‘Send Copy’, then choose ‘Shortcuts’. Select the shortcut you previously created. Done.

Advanced Apple Shortcut example
If you want your Apple Shortcut to also work on an iPhone or iPad, you have to use the ‘Run script over SSH’ building block in Apple Shortcuts!
Here is a more advanced Apple Shortcut:
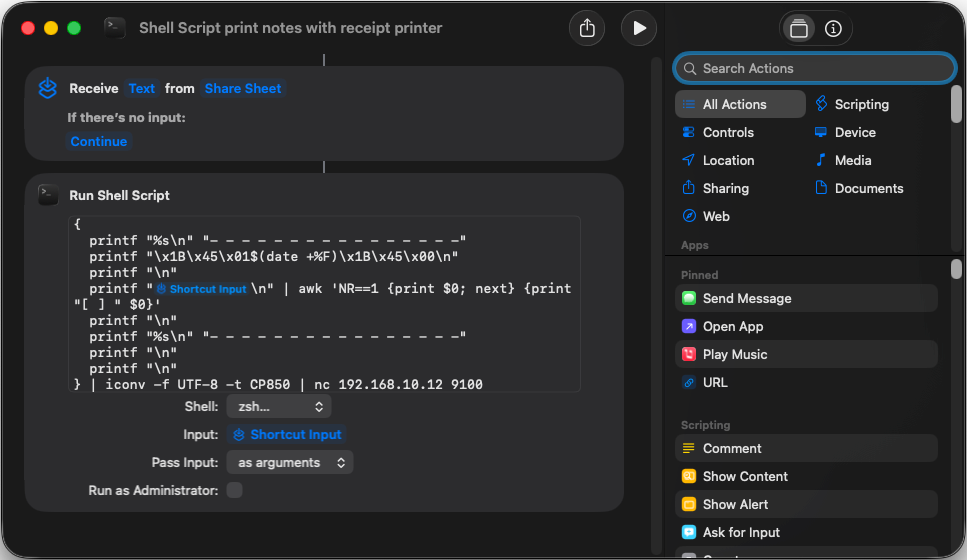
- It uses the ‘Run Shell Script’ building block instead of the ‘Run script over SSH’ one.
- It performs some formatting on the Text input.
- It prints with
p910ndvianc(netcat), so SSH is not necessary.
On the receiving machine p910nd is running.- I wrote a short documentation on how to get p910nd up and running on Unraid
What does it do?
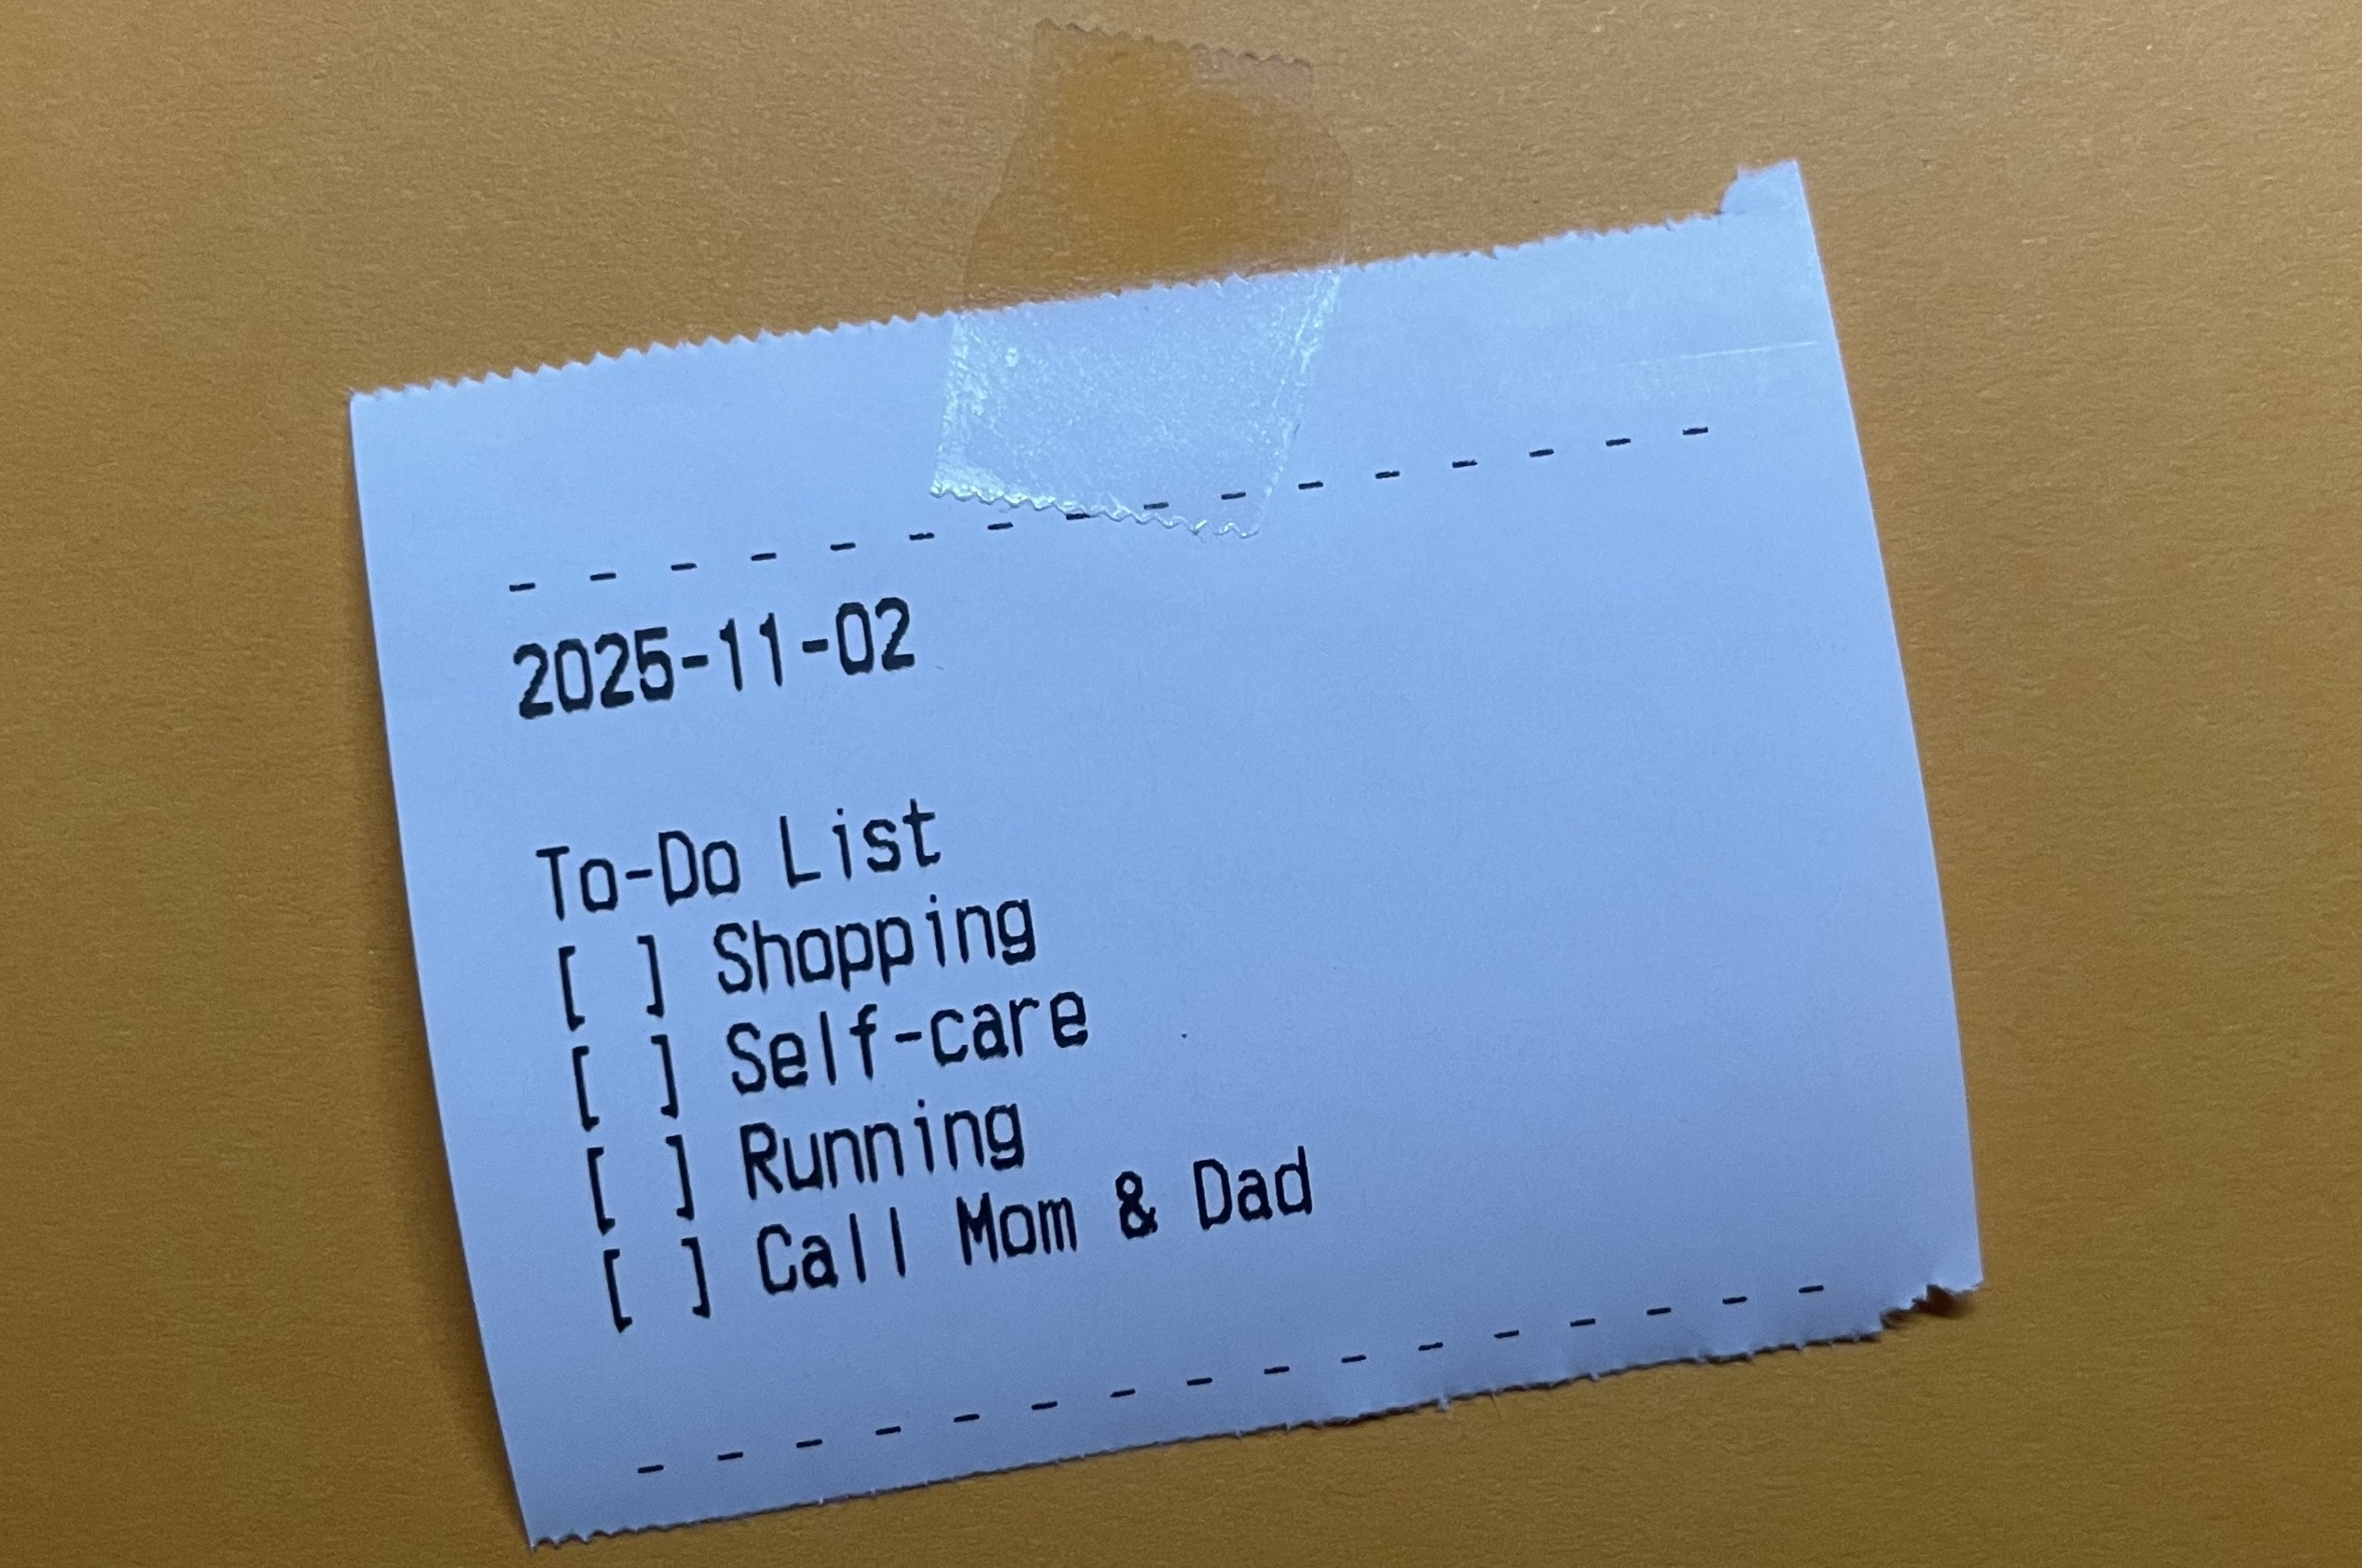
The advanced shortcut takes an ‘unformatted’ note from Apple Notes and expands it as shown below:
# Apple Notes             # Printer Output

                          - - - - - - - - - - - - - - - -
                          2025-10-25
To-Do:            -->
Buy milk          -->     To-Do:
Buy apples        -->     [ ] Buy milk
Go swimming       -->     [ ] Buy apples
                          [ ] Go swimming

                          - - - - - - - - - - - - - - - -
The script in more detail
{
  printf "%s\n" "- - - - - - - - - - - - - - - -"
  printf "\x1B\x45\x01$(date +%F)\x1B\x45\x00\n"
  printf "\n"
  printf "Shortcut Input\n" | awk 'NR==1 {print $0; next} {print "[ ] " $0}'
  printf "\n"
  printf "%s\n" "- - - - - - - - - - - - - - - -"
  printf "\n"
  printf "\n"
} | iconv -f UTF-8 -t CP850 | nc 192.168.10.12 9100
printf "\x1B\x45\x01$(date +%F)\x1B\x45\x00\n":
Prints the current date in YYYY-MM-DD format.\x1B\x45\x01&\x1B\x45\x00send a ESC/POS command to enable emphasized/bold printing and the second part disables the emphasis again.
| awk 'NR==1 {print $0; next} {print "[ ] " $0}:
This uses the awk command to process the received note text.NR==1 {print $0; next}: It leaves the first line as is.{print "[ ] " $0}: It adds [ ] as a prefix to every subsequent line.
| iconv -f UTF-8 -t CP850:
Converts the character encoding from UTF-8 to CP850.
This ensures that characters likeÄÖÜprint correctly.| nc 192.168.10.12 9100:
Pipes the converted bytes intonc(netcat).
Printer Setup
Prerequisites
- A ESC/POS receipt printer.
- A Linux server or Raspberry Pi running, with the ESC/POS printer connected via USB.
Personally, I am running a small Unraid NAS to which I connected my ESC/POS receipt printer via USB.
A note on ‘portable’ ESC/POS printers
Be aware that my printer, at least, is sold as a ‘portable’ unit (which also supports Bluetooth), which means that it has built-in power-saving features. That’s all to say that I have to turn on the printer again from time to time.
Other units - without a built-in battery - don’t have these ’limitations’.
Steps to follow
- Connect the ESC/POS printer via USB to your Linux machine
- Check whether the printer is properly recognized
e.g. by usinglsusbordmesg.
Example output from my Unraid server:
# lsusb
Bus 001 Device 025: ID 28e9:0289 GDMicroelectronics micro-printer
# dmesg | tail -n 20
usblp 1-3:1.0: usblp0: USB Bidirectional printer dev 7 if 0 alt 0 proto 2 vid 0x28E9 pid 0x0289- Perform a test print from your Linux machine:
echo "Hello World!" >> /dev/usb/lp0That’s it, a working printer, without CUPS or any driver installation needed.